Swagger를 이용한 API 문서 자동화
Swagger는 간단한 설정으로 프로젝트의 API를 문서화 시켜주는 라이브러리이다.
Swagger를 사용하면 API 목록 및 설명을 볼 수 있으며, 직접 테스트해볼 수 있다.
Swagger Dependency 추가
maven 프로젝트 기준으로 pom.xml에 의존성을 추가한다.
- 2.x 버전
<dependency>
    <groupId>io.springfox</groupId>
    <artifactId>springfox-swagger2</artifactId>
    <version>2.9.2</version>
</dependency>
<dependency>
    <groupId>io.springfox</groupId>
    <artifactId>springfox-swagger-ui</artifactId>
    <version>2.9.2</version>
</dependency>
- 3.0 버전
<dependency>
  <groupId>io.springfox</groupId>
  <artifactId>springfox-boot-starter</artifactId>
  <version>3.0.0</version>
</dependency>
3.0 버전부터는 springfox-boot-starter 하나만 추가하면 다 포함하고 있다.
만약
documentationPluginsBootstrapper 관련 에러가 나타난다면
application.properties에 아래 설정을 추가해주자.
spring.mvc.pathmatch.matching-strategy = ANT_PATH_MATCHER
Swagger 설정
Swagger의 설정을 담당할 클래스를 하나 만들고,
@Configuration, @EnableSwagger2 어노테이션을 추가한다.
3.0 버전 부터는 @EnableSwagger2 어노테이션은 사용하지 않아도 된다.
@Configuration
public class SwaggerConfiguration {
  private final String API_NAME = "Todo API";
  private final String API_VERSION = "1.0";
  private final String API_DESCRIPTION = "<img src=\"https://to-do-cdn.microsoft.com/static-assets/c87265a87f887380a04cf21925a56539b29364b51ae53e089c3ee2b2180148c6/icons/logo.png\" width=\"50\"><h3>Todo API 1.0</h3>Swagger를 이용한 Todo list API";

  @Bean
  public Docket api() {
    return new Docket(DocumentationType.SWAGGER_2)
          .apiInfo(apiInfo()).groupName(API_VERSION).select()
          .apis(RequestHandlerSelectors.basePackage("com.mvc.controller"))
          .paths(PathSelectors.ant("/**")).build()
          .useDefaultResponseMessages(false);
  }

  private ApiInfo apiInfo() {
  return new ApiInfoBuilder()
    .title(API_NAME)
    .description(API_DESCRIPTION)
    .contact(new Contact("우정무", "http://applelime.github.io", "app.le@kakao.com"))
    .version(API_VERSION)
    .build();
  }
}
기본 틀은 위처럼 구성된다.
Docket은 swagger 설정의 핵심이 되는 Bean으로 @Bean 어노테이션을 추가한다.
apiInfo는 말그대로 API에 관한 정보를 설정하는 부분이고,
apis에서는 API를 문서화할 패키지를 설정
paths에서는 해당 API중 특정 path를 선택한다.
useDefaultResponseMessage는 기본 응답코드(200, 404, ..)를 노출하지 않는 설정이다.
Swagger 동작 확인
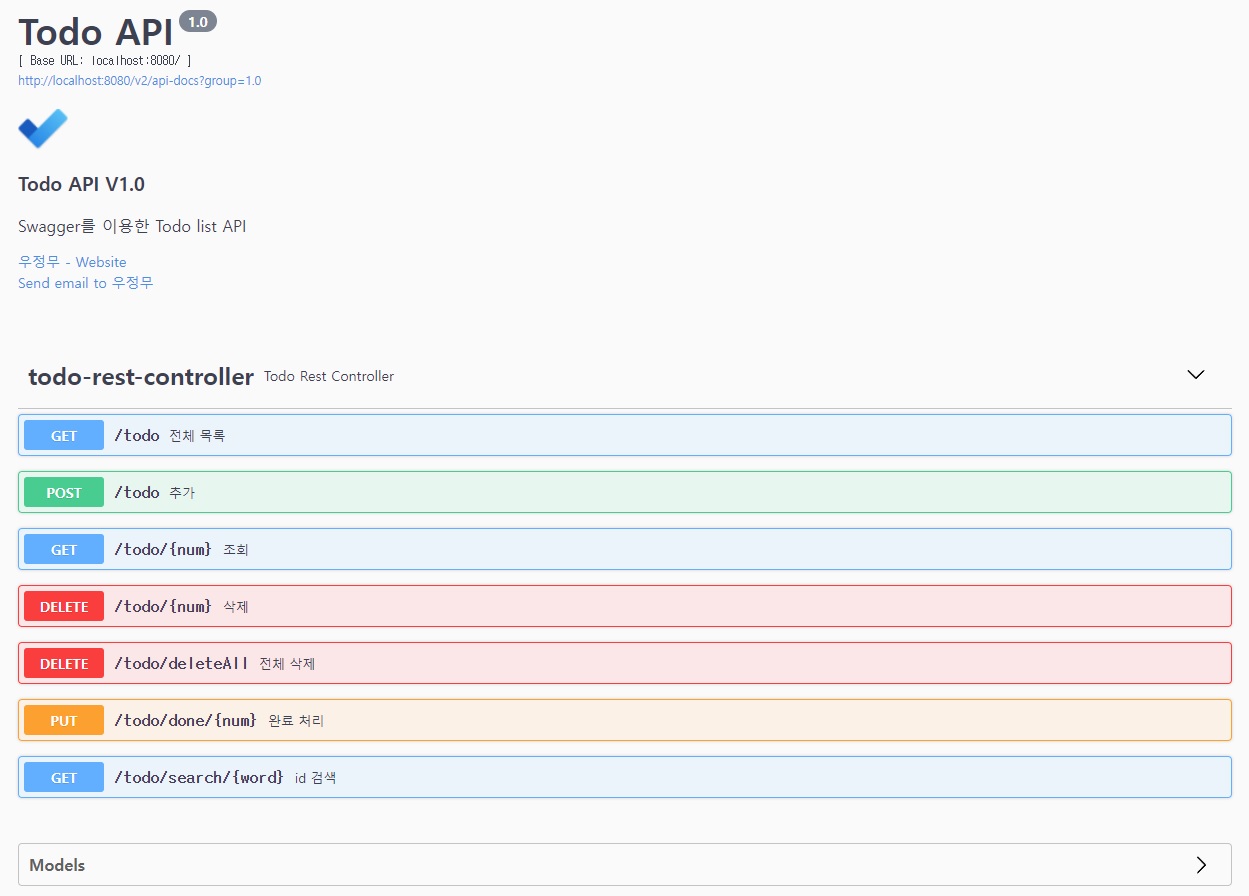
2.x 버전에서는 http://host/context-path/swagger-ui.html
3.0 버전에서는 http://host/context-path/swagger-ui/ 또는 http://host/context-path/swagger-ui/index.html
로 접속하면 위와 같은 문서가 나타난다.
추가 설정
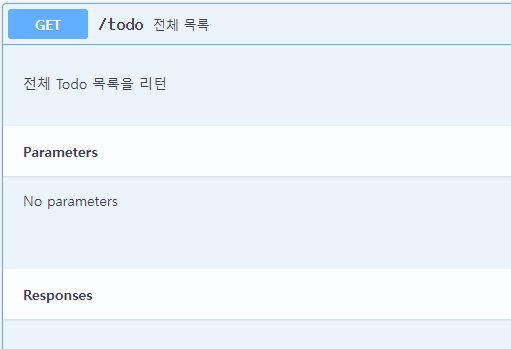
@Api 어노테이션으로 해당 컨트롤러에 API에 대한 설명을 추가할 수 있다.
@ApiOperation 어노테이션으로 해당 API에 대한 간단한 설명을 추가할 수 있다.
@RestController
@Api("Todo Controller V1.0")
public class TodoRestController {
  @Autowired
  TodoService service;

  @ApiOperation(value = "전체 목록", notes = "전체 Todo 목록을 리턴")
  @GetMapping("/todo")
  public List<Todo> selectAll(Model model) {
    return service.selectAll();
  }
  ...
}
마찬가지로 Model에 대한 설명도 아래 어노테이션으로 추가할 수 있다.
@ApiModel 어노테이션으로 간단한 이름과 설명,
@ApiModelProperty 어노테이션으로 해당 변수에 대한 설명을 추가 가능하다.
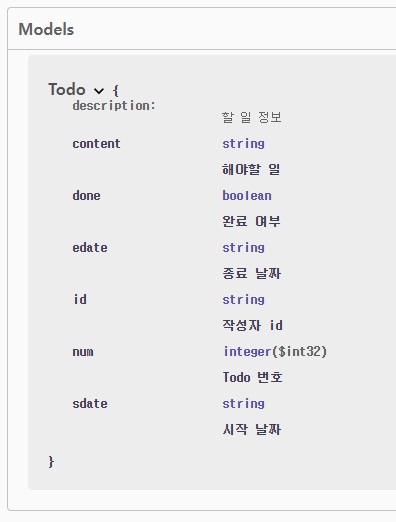
@ApiModel(value = "Todo", description = "할 일 정보")
public class Todo {
  @ApiModelProperty(value = "Todo 번호")
  int num;
  @ApiModelProperty(value = "작성자 id")
  String id;
  @ApiModelProperty(value = "해야할 일")
  String content;
  @ApiModelProperty(value = "시작 날짜")
  String sdate;
  @ApiModelProperty(value = "종료 날짜")
  String edate;
  @ApiModelProperty(value = "완료 여부")
  boolean done;
  ...
}